 Last week, I picked up a Hyperkin Retron HD to see what it’s all about. I’ve spent the last few days putting it through the wringer and making it do some things it probably shouldn’t oughtta do. How’d it turn out? Read my exhaustive report right now!
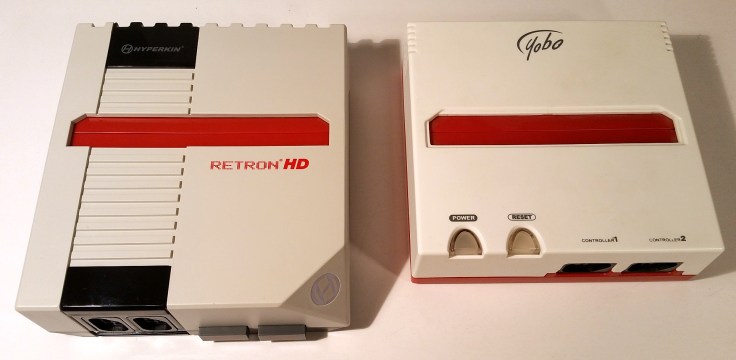
Here’s the backstory: for a long time now, I’ve needed a new NES console. I have four or five original NES units, but none of them work reliably (the usual blinky-blinky — I know it’s the connectors on all of them, and I’ve even had a few unused 72-pins laying around for years, but haven’t gotten around to installing them). For the past 10-12 years, I’ve been playing NES games on a Yobo clone. Yeah, not the most awesome replacement for an NES, but when they came out around 2005, it was at least a cheap, working solution.
Well, those Yobos sure like to hold a death grip on your cartridges — it’s a struggle even for a grown-ass man like myself to rip a game out of that sucker without breaking everything — and eventually, one of the pins in the Yobo’s connector bent, so every time I want to play an NES game, I have to make sure that one stupid little pin is in the right position, otherwise it won’t run.
Fast-forward to last week, when I finally had enough, and decided to pick up a Retron HD and see how it performed. At the absolute bare minimum of expectations, I just wanted an NES console that I could just get my games in and out of safely without breaking a sweat (or a console, or a cartridge). Of course, I wanted to see just what this thing could do, so I set about trying out everything I could think of. The following are my results…
The Console

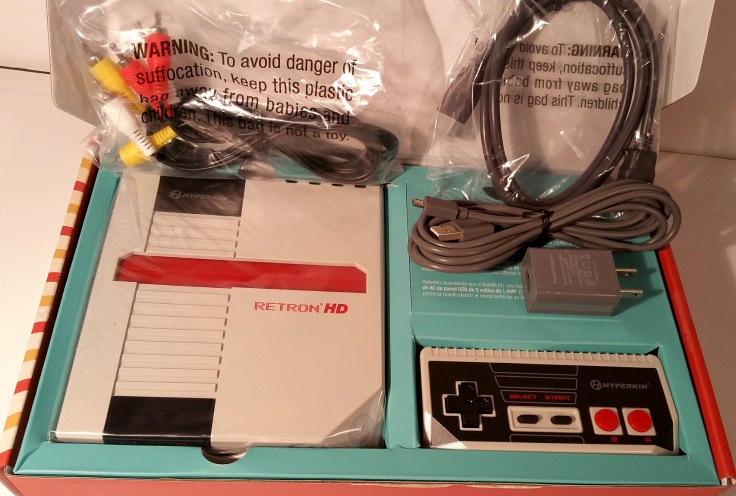
Packaged in a sleek box featuring Hyperkin’s trademark angled corner design element, the Retron HD includes the console, one controller, a set of A/V composite cables, an HDMI cable, and a USB power cord with an AC adapter.
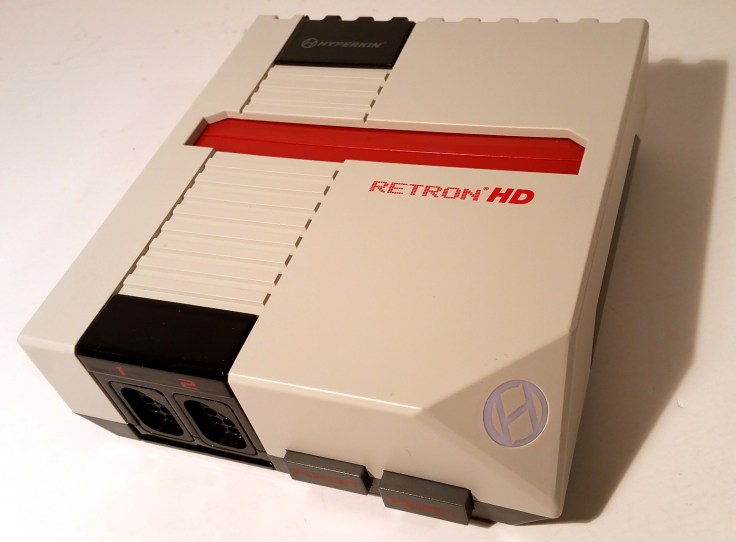
The RHD is a nice, compact unit, barely bigger than a few NES cartridges stacked together, slightly larger than the Yobo or a PC-Engine. The industrial design is really appealing, taking many design elements from the original NES. It’s not overly heavy, but it feels much nicer than the bare-bones construction of the Yobo.

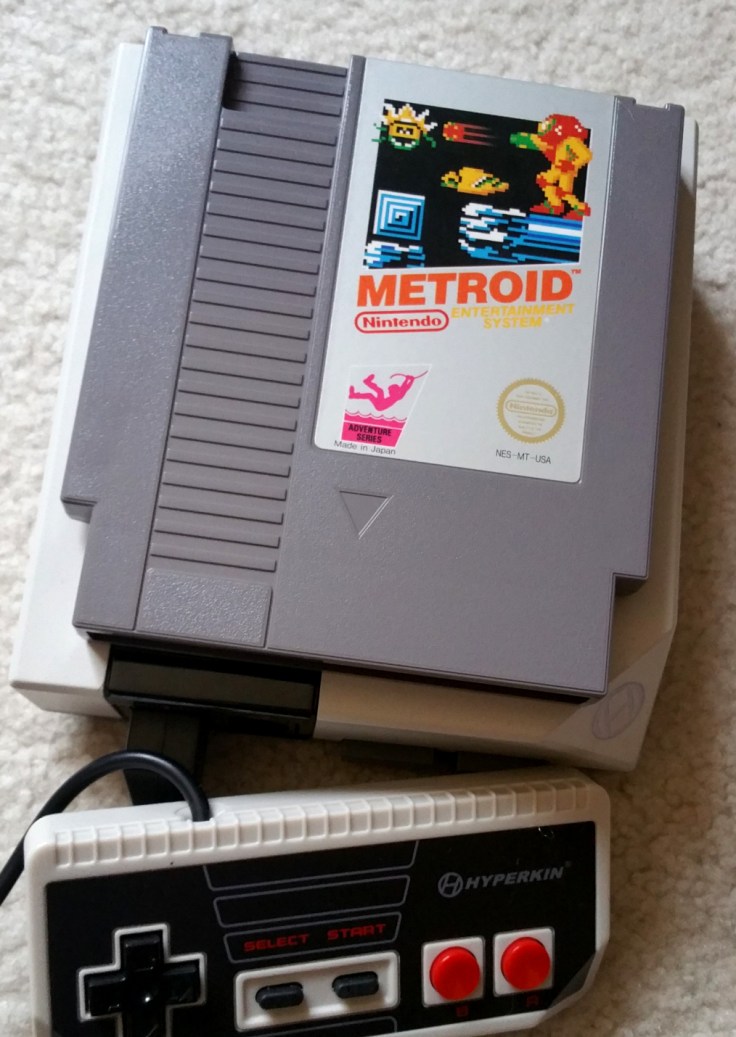
The controller is likewise familiar, yet redesigned.

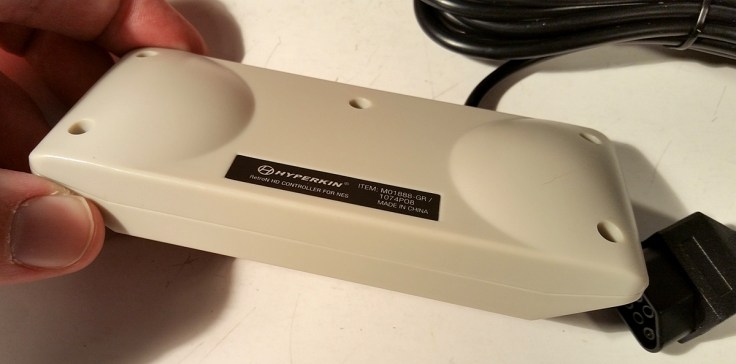 The corner cutaways on its face are actually functional as they make the controller more comfortable to hold without digging into your palms; on the underside, two rounded, convex grips help your sweaty mitts hold on during those intense late stages in Ninja Gaiden.
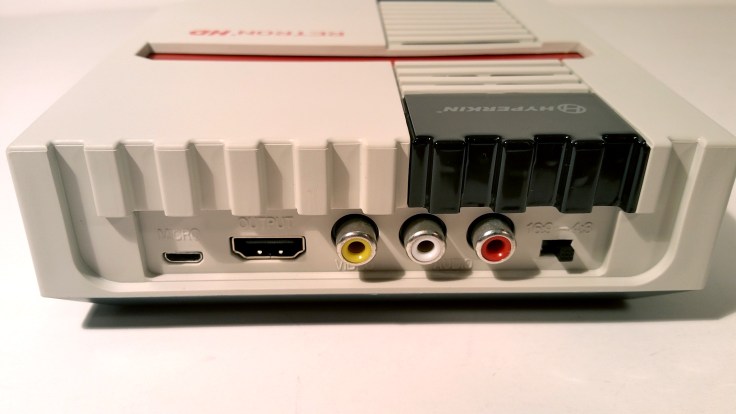
On the back of the RHD, we find the following: a Micro USB connection for power, an HDMI output, standard yellow/white/red RCA composite jacks, and a 2-position switch that toggles between 16:9 and 4:3 aspect ratios.
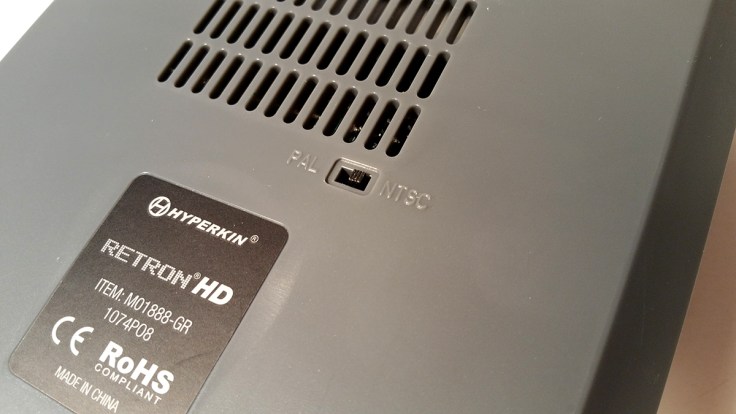
Underneath, there’s also a switch that allows the user to change between NTSC and PAL formats, making the RHD usable in US/Japan and European regions. That’s pretty cool! We’ll play with that later.
The Setup
Firstly, please excuse the hot mess that is the Retro Game SuperHyper game research lab, but it’s difficult keeping things tidy when there’s so much intense work going on, you know?
The two main things I wanted to test were graphical output and game compatibility. The Retron HD uses “NES-on-a-chip” technology, much like other NES clones like the Yobo or the Messiah Generation NEX have used for the past 15 years or so, as opposed to newer FPGA-based consoles like the RetroUSB AVS and the Analogue NT Mini. NOAC are never 100% accurate nor 100% compatible, but they’re usually close enough for most folks.
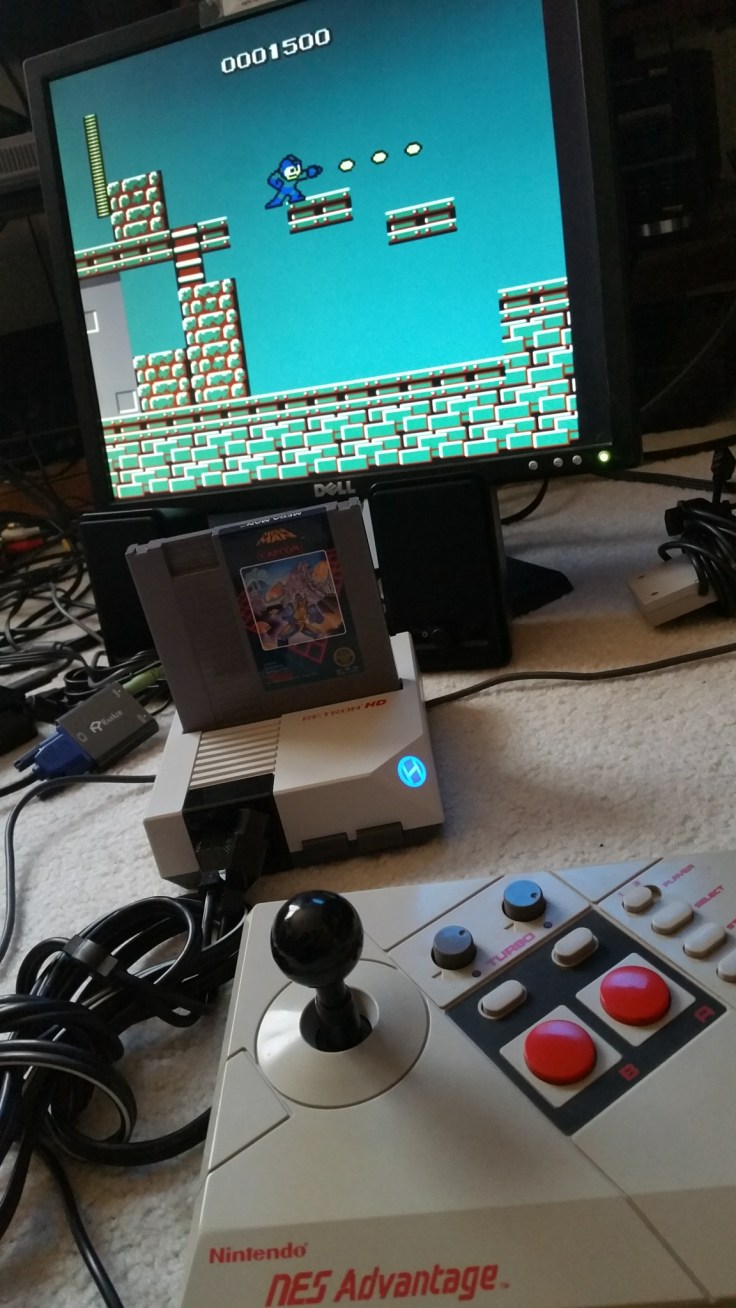
Some of the games I tried out (not all of which are shown here) included Mega Man, Metroid, Golgo 13: Top Secret Episode, Mighty Final Fight, Castlevania III, Donkey Kong 3, Legend of Zelda, Kirby’s Adventure, repro carts of Earthbound and Recca, and Famicom games such as Super Mario Bros., Boku Dracula-kun, Gradius II, Tetsuwan Atom, Jesus, Ninja Ryukenden II, and probably more that I don’t recall.
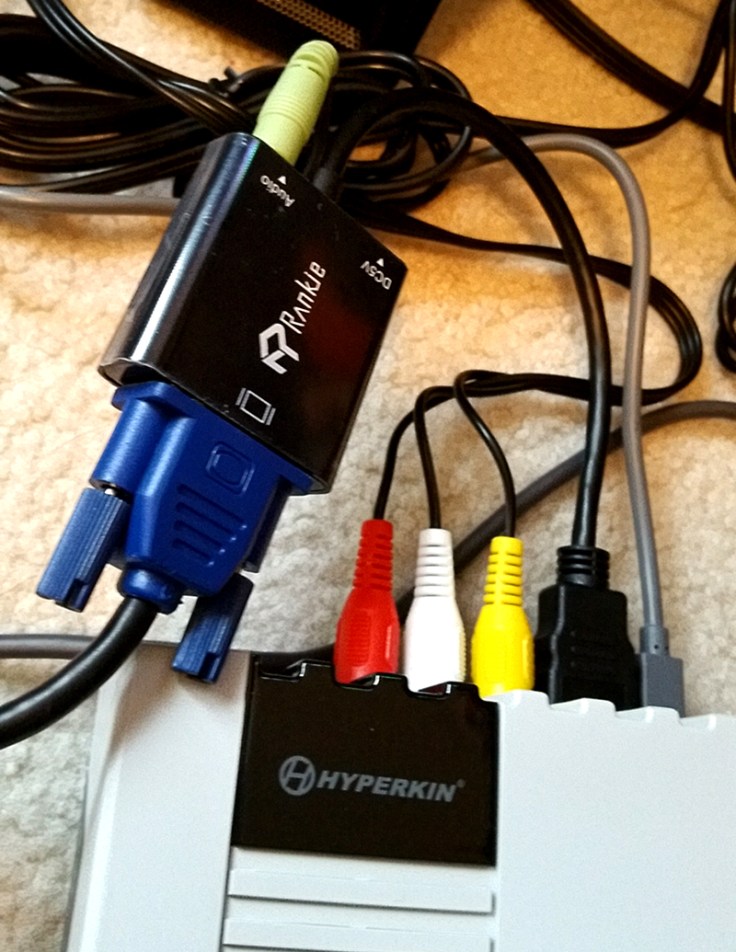
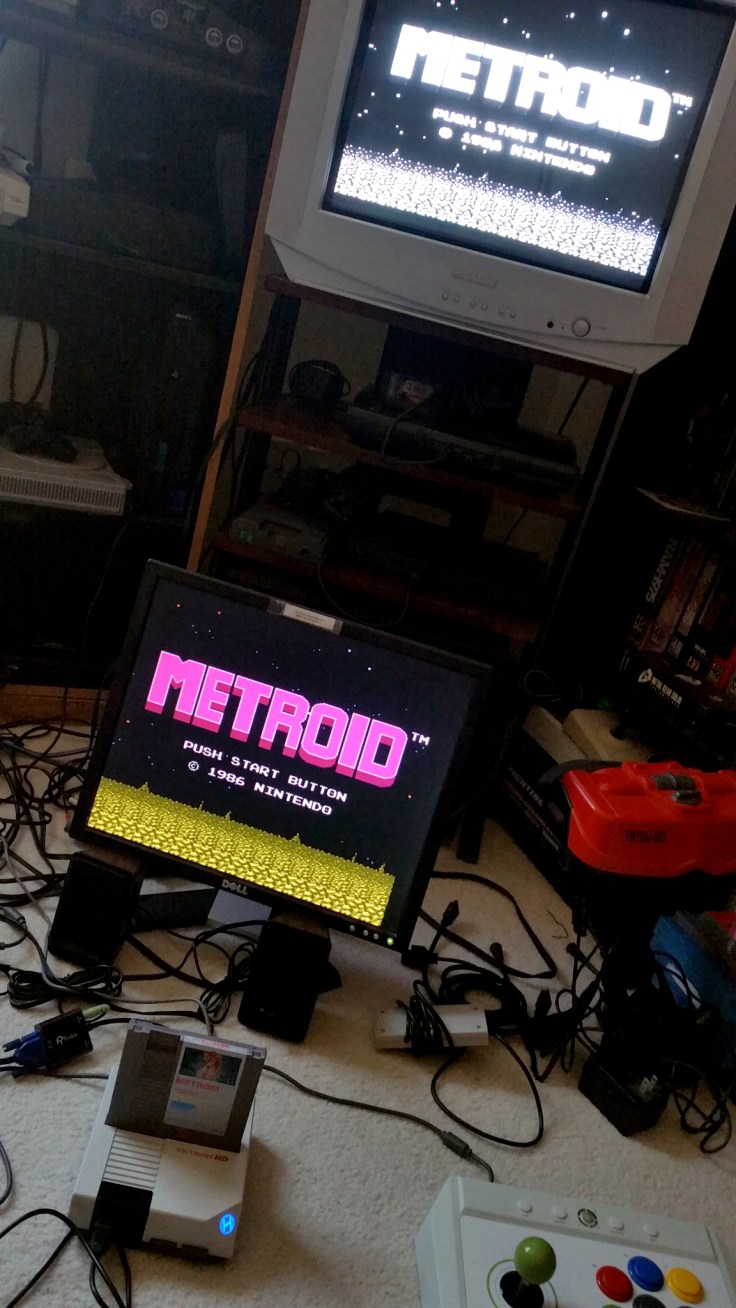
I wanted to test the RHD’s output on at least three different monitor options: composite to a CRT, HDMI on an HDTV, and also HDMI converted to VGA.
So for the first part of the test, I simultaneously hooked it up to a CRT with the composite cables, as well as a 19″ 4:3 Dell VGA monitor and a pair of portable speakers by using an HDMI-to-VGA convertor with a 3.5mm audio jack.

Performance: Output
A couple things I’d like to note before starting this section:
One is that I was worried the converted HDMI>VGA signal would cause a lag in performance, but it turned out the action was spot-on, so luckily that was a non-issue.
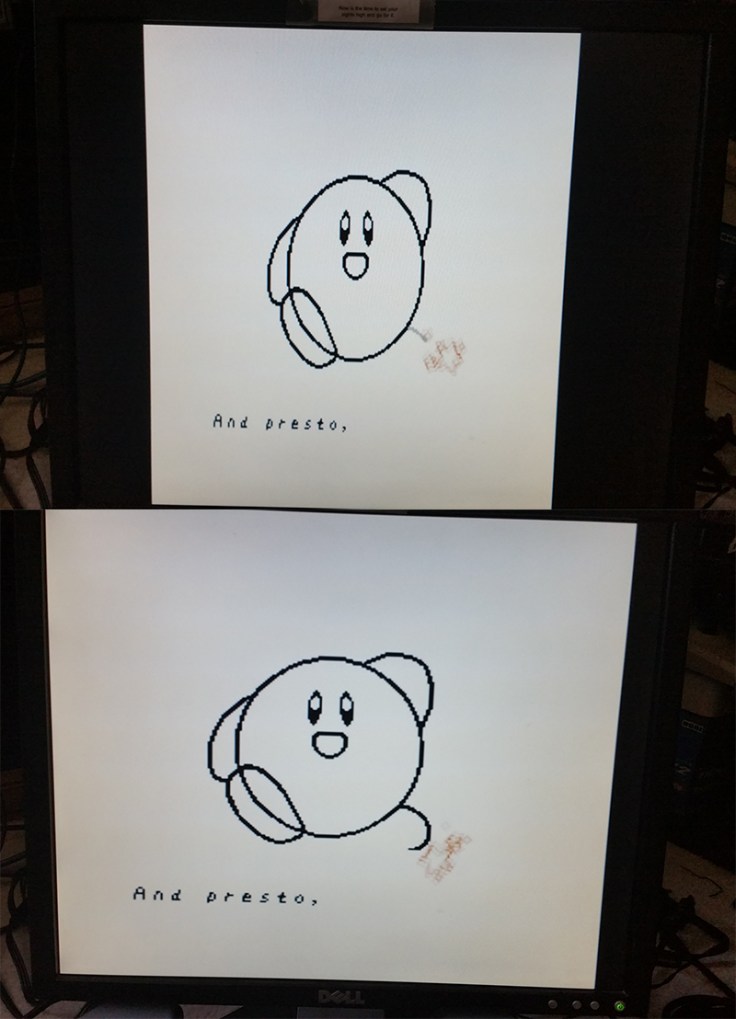
And secondly, it may be worth noting that in order to display on a 4:3 LCD monitor through HDMI>VGA conversion, I actually had to set the console to 16:9 mode (see Kirby comparison below), which makes sense because HDMI is not really meant to display to 4:3 monitors. Switching it to 16:9 did not affect the composite output the the CRT, however; it only affects the HDMI output.
The composite signal was average, as expected; colors and sounds seemed as correct as the other aforementioned NES clones.
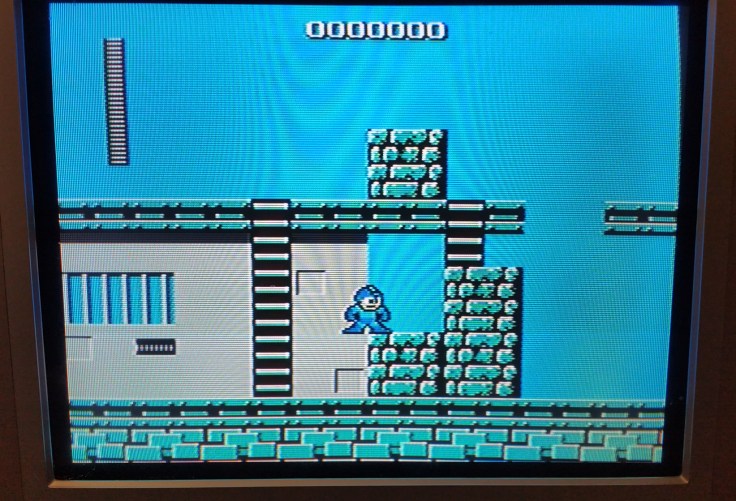
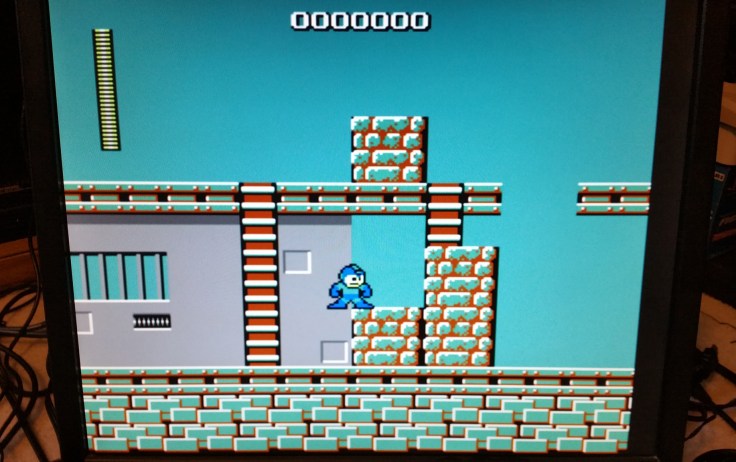
The HDMI>VGA looked fairly clean, but some colors were notably different; in some cases they were brighter, in some cases darker. Notice the reds in these Mega Man shots.
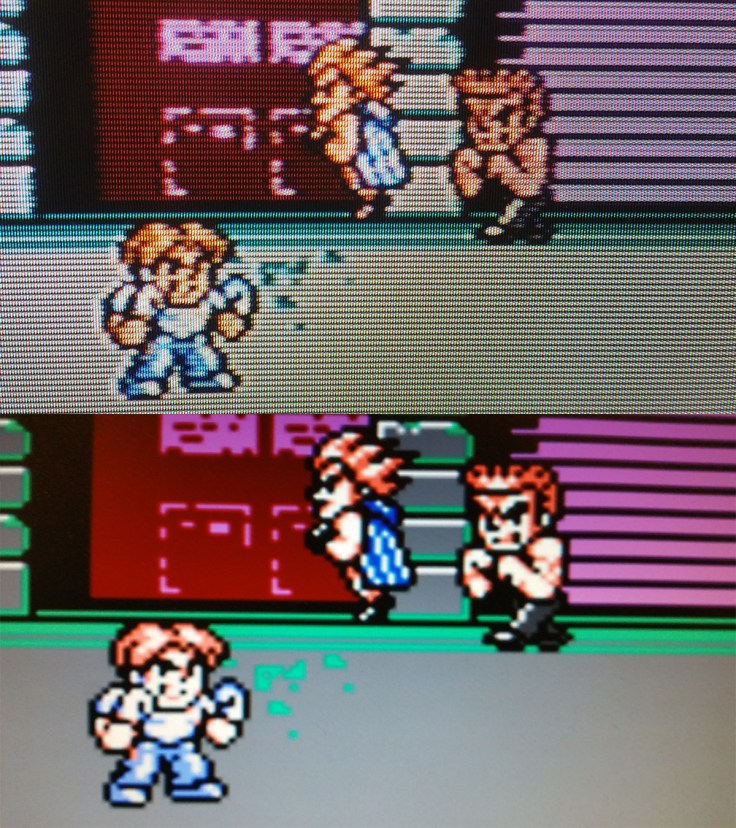
Here’s a comparison of Mighty Final Fight. The HDMI colors are more vivid, but check out the difference in the greens and grays: on the composite output, the gray is light and the green is darker; the HDMI shows darker gray and lighter green, which makes it look a bit less natural.
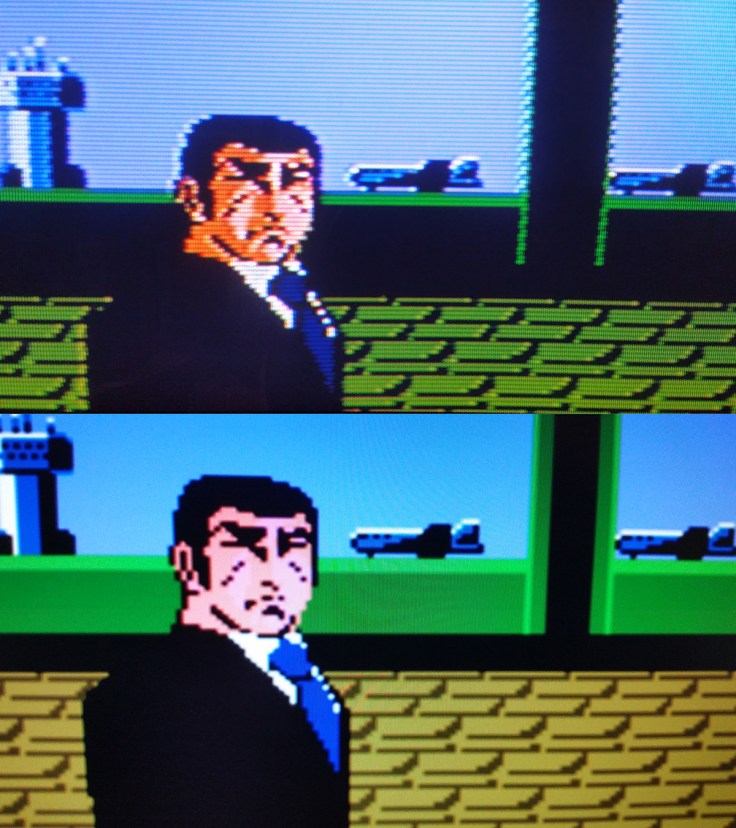
Here’s another side-by-side, this time of Golgo 13. The much greater contrast in the skin tones from the composite is very obvious, but there are more greens showing up in the background in HDMI that are practically nonexistent in composite. Also, the HDMI output seems to interpolate a bit, creating some “angles” between pixels (see the top of Duke Togo’s head).
After all this, I then wanted to see if there was any difference between the HDMI>VGA test and just running the console straight to an HDTV. For this, I used the HDMI cable included with the package, and ran it on a 32″ Samsung 720p HDTV.
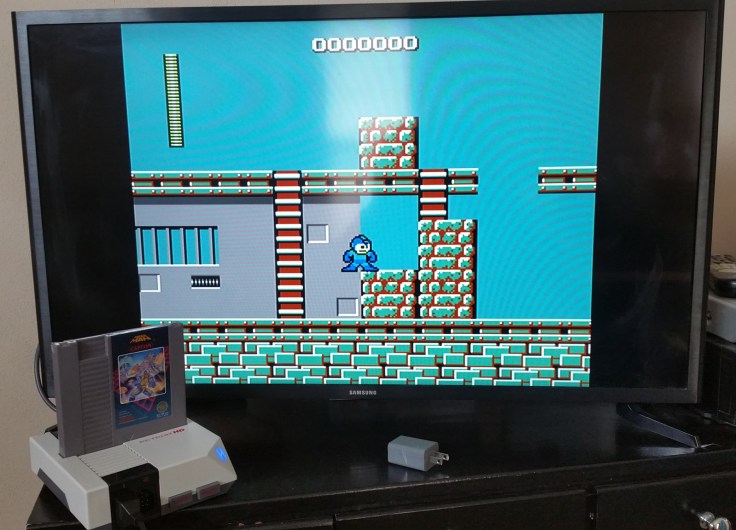
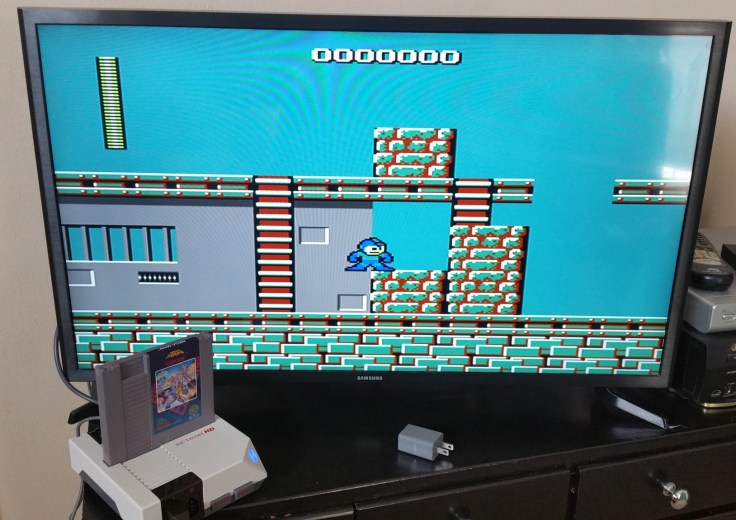
The results were pretty much identical to the VGA monitor, other than running it in 4:3 mode this time for the correct aspect ratio. Switching it to 16:9 stretches the image out, which fills the screen, but I don’t know why you’d want to do that because it looks ridiculous:
One nice feature of the Retron HD is that you can actually take off the AC adapter and power the console via USB. Notice in the photos above that the AC adapter is not being used, as I have the console plugged into the USB port in the television.
The only issue I have left to bring up regarding visual output, then, is the fact that even in HDMI, the graphics are soft. Below are some close-up shots of all three output options I tested, plus a comparison to Mega Man running on RetroPie on a Raspberry Pi 3 hooked up to the same VGA LCD monitor with the HDMI>VGA convertor.
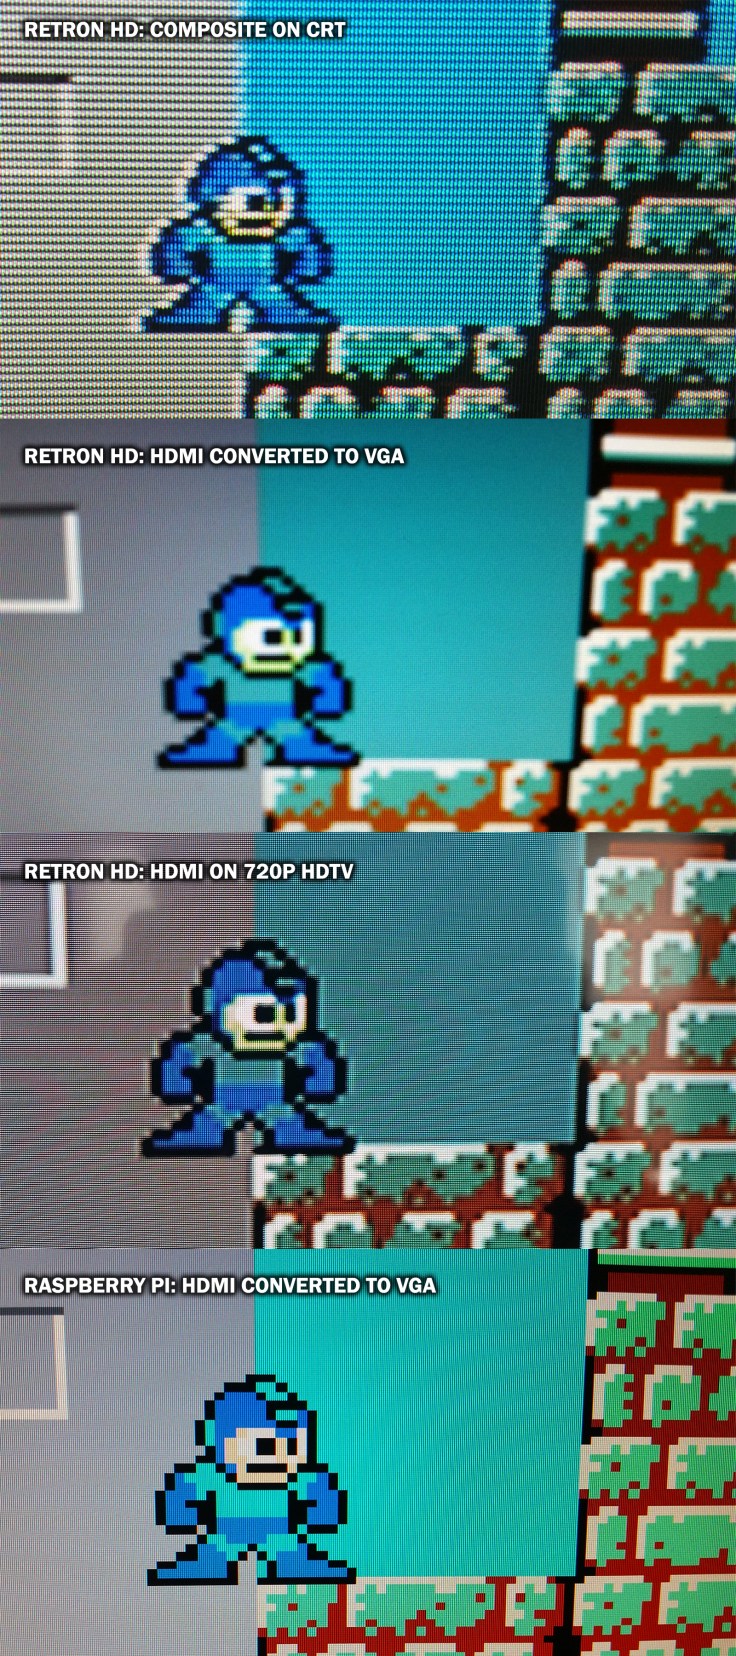
The middle two look a bit different from each other, as the HDTV looks like it’s trying to sharpen the image — but this is likely due to the TV’s settings, not anything to do with the console’s output. Neither of them compare with the emulator, although again, that’s not the console’s fault — that’s totally different technology. Note that, according to the emulator, some colors are more accurate in composite (skin tones) and some in HDMI (reds). Ultimately, it all looks pretty good for an NES game, but I have to say, I think the old-school composite is still my favorite.
Performance: Compatibility
This is where things got interesting. Knowing that NES-on-a-chip consoles are not always compatible with every game, I was very eager to find out what the Retron HD could and could not play. The results were mixed — and surprising.
The quickest and simplest test was using other NES controllers, which of course worked perfectly. That’s good, cuz I loves my NES Advantage.
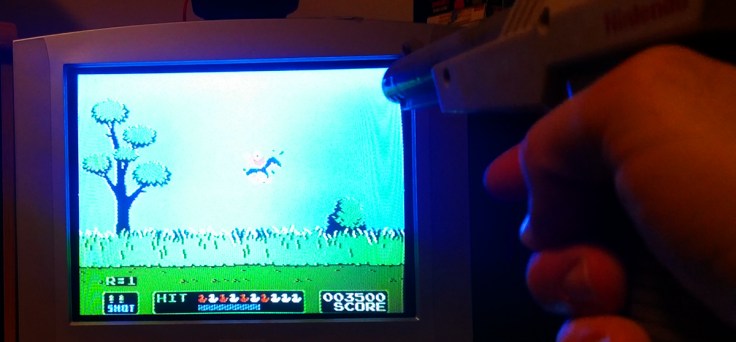
Then I tried the other-most-beloved NES accessory, the Zapper light gun, with a few games of Duck Hunt. I kind of suspected the results, and my suspicions were confirmed: the Zapper works on the CRT, but not the monitor.

On to testing game compatibility, then. Standard, officially-released NES games had no problems. Mega Man, Metroid, Zelda, Metal Storm, all my favorites played just fine. Castlevania III, the only MMC5 game I own, ran perfectly.
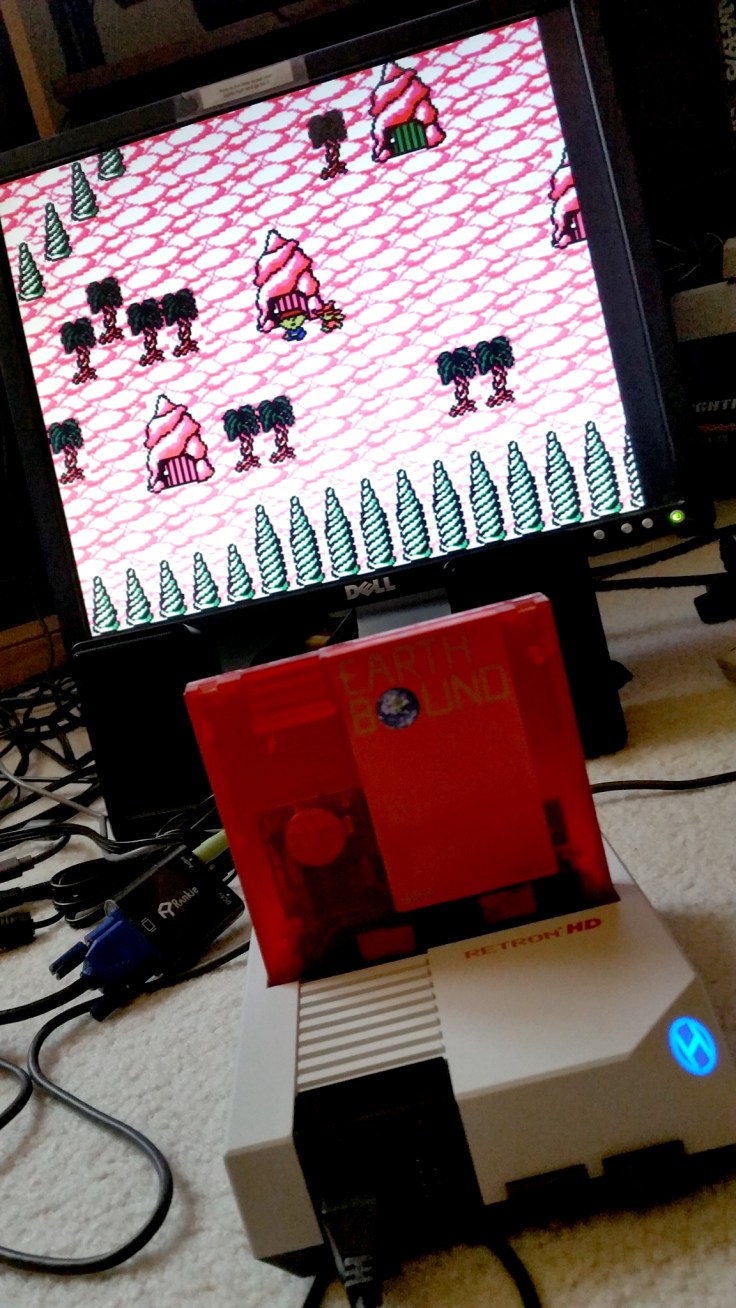
Repros were almost as good: I tried my repro carts of Super Mario 2 Japan, Earthbound, and Recca. SMB2 ran correctly. Earthbound, too, loaded up and played like it should, although this is a good place to note the color of the skin tones via HDMI: they’re a little green (this was the case in many other games as well).
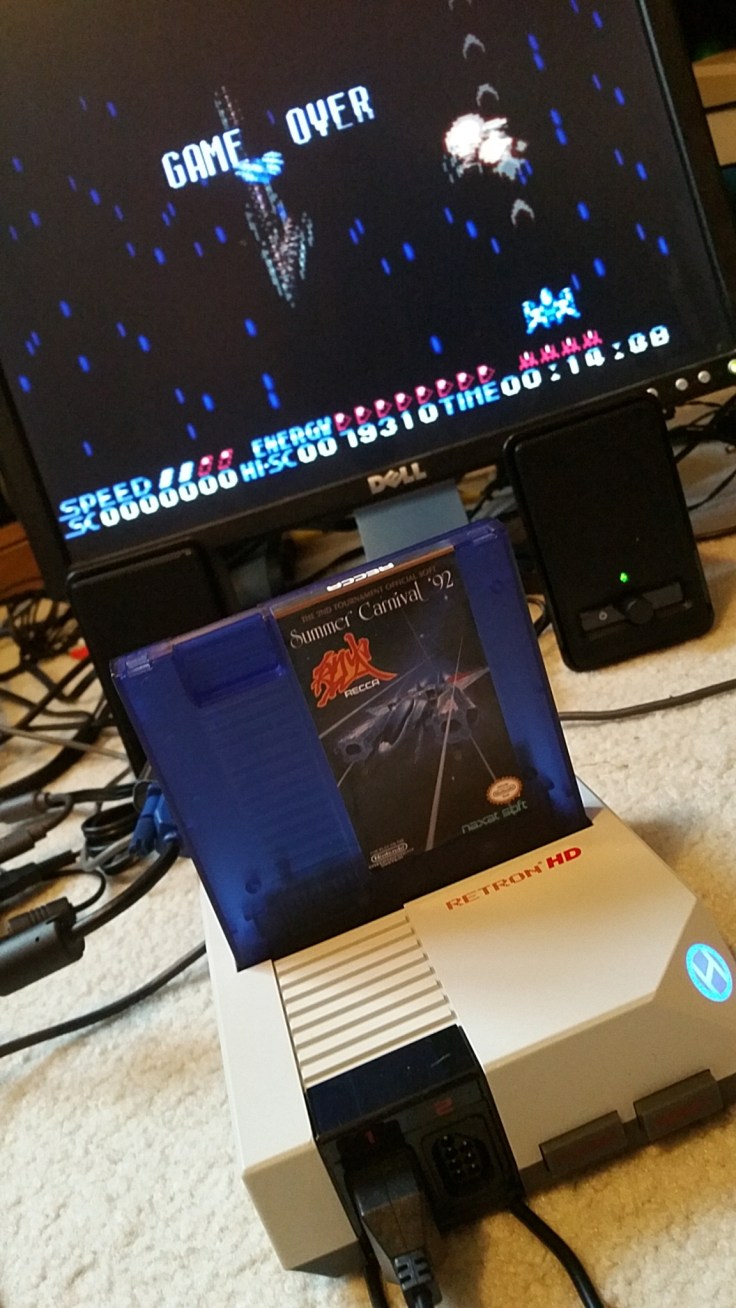
My repro of Recca gave me some mixed results, however. Although the game ran fine, there were garbage sprites flickering all over the screen. This could of course be due to the fact that it’s a handmade repro, but I must note that I never got that garbage from this cart on an original NES or even the Yobo.
Then came time to try out some Famicom games, by way of my old-school Honey Bee adapter (which you can read more about here). Again, I had mixed results, some pleasantly surprising, and some deeply concerning.
Super Mario Bros: Check. Ninja Ryukenden II (aka Ninja Gaiden II): Check. Image Fight, Jesus, Boku Dracula-kun: Check, check, checkaroonie.
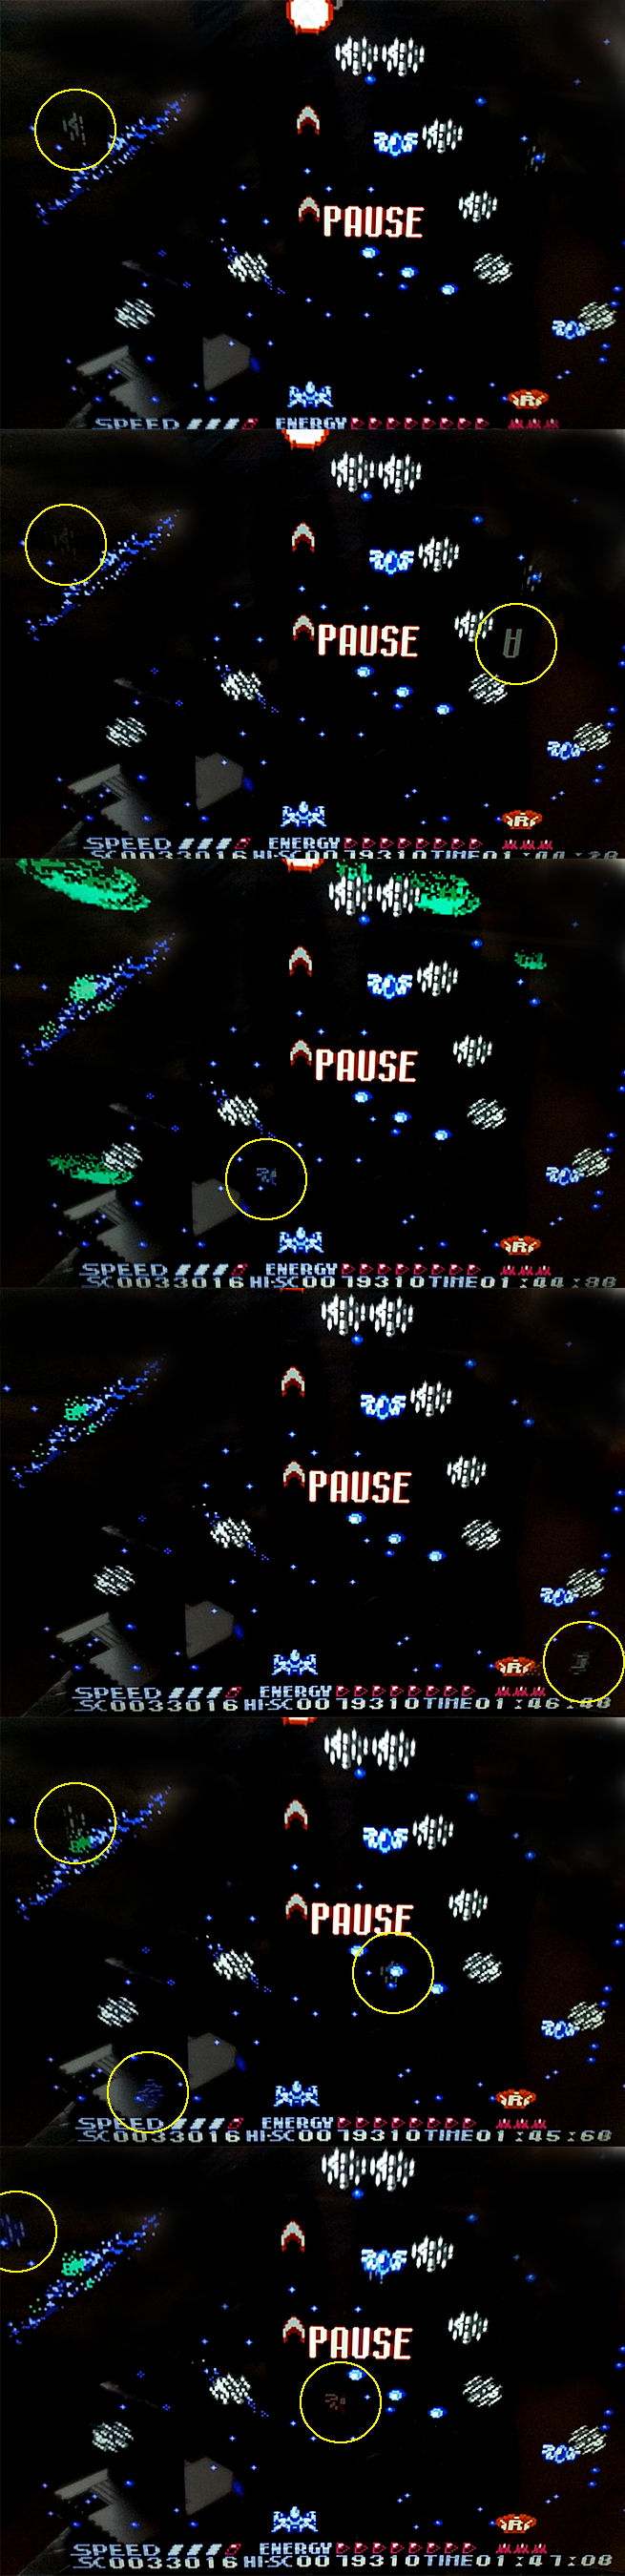
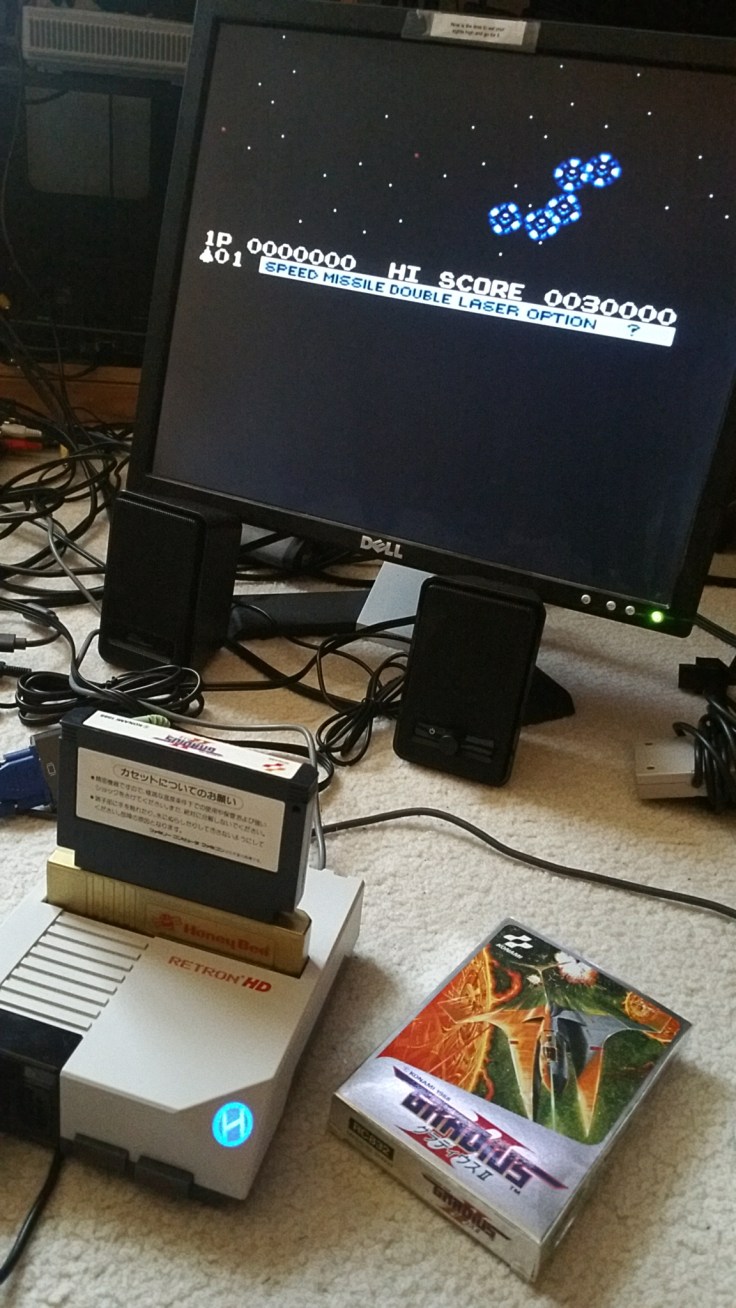
Then I tried my beloved Gradius II.
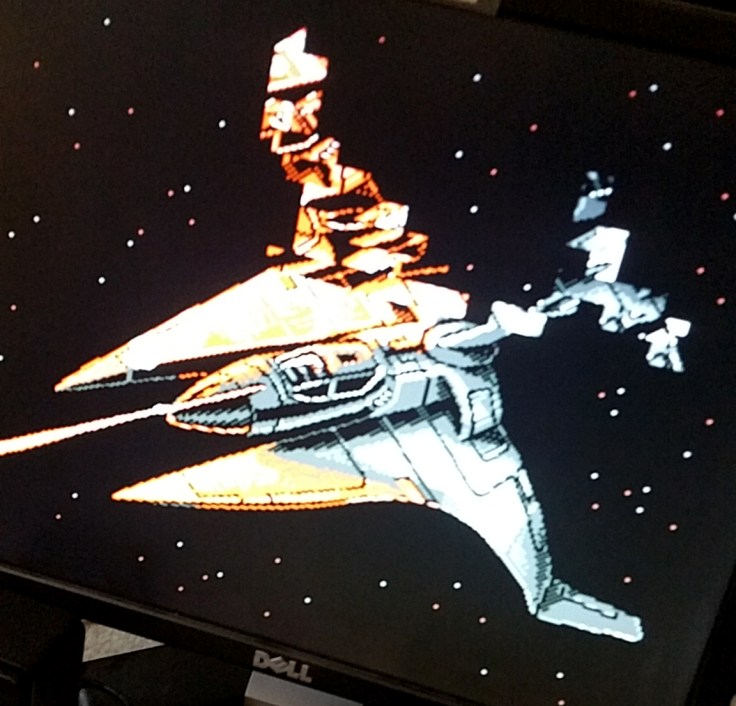
The introductory screen of the Vic Viper was my first indication that this was not going to end well.
However, the title screen and weapon select screen looked fine, so I thought maybe the cartridge just wasn’t seated quite right. Then the game began:
Only the top half of the screen was visible, the weapons bar was halfway up the screen, and the bottom half was blank. This is not good.
As I said, I thought maybe the cartridge or adapter were just seated wrong, so I took everything out and re-inserted it. Same results. Turned it off and on again, changed the aspect ratio, same results on both the HDMI and composite outputs.
So I did the unthinkable: I tried it on the Yobo. It worked perfectly. Put it back in the Retron HD: same results. Heartbreak.
I don’t know what proprietary tech Gradius II might have inside it, as Konami was known for putting custom, performance-enhancing chips in a lot of their Famicom games. I don’t own copies of other chip-enhanced Konami Famicom titles like Akumajou Densetsu (Castlevania III) or Lagrange Point to check those out, but if any of you readers do, I’d be interested in hearing how they fare on the RHD.
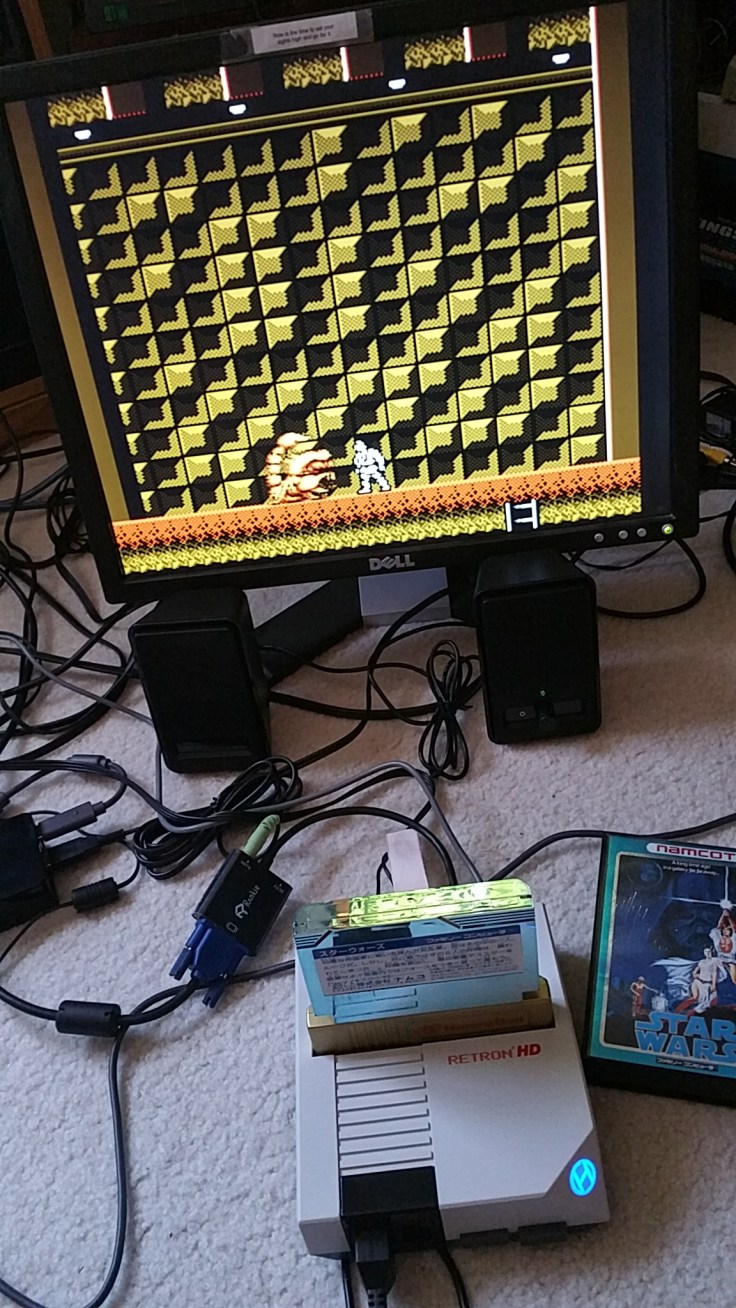
While Gradius II was a letdown, I do want to end this section on a more positive note: the Star Wars game by Namcot, always known to be incompatible with NES clones, actually works great on the Retron HD!
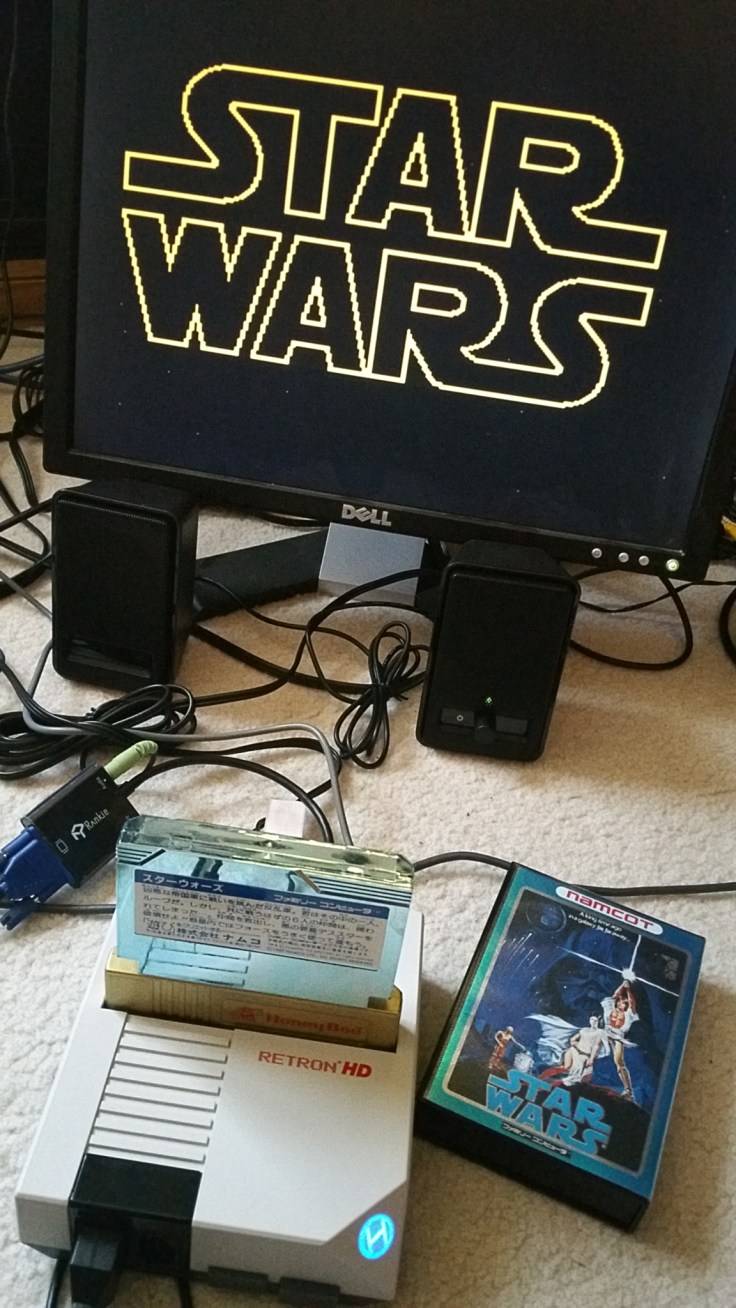
As you may know, this is not the same Star Wars game that was released on the NES in the US, but an entirely different and completely wackadoodle take on Star Wars that was only released in Japan. Unfortunately, the Retron HD does not make this game make any more sense.
So, game compatibility: hit and miss. More hit than miss, but the misses really kinda sting.
Other Stuff
Really, that’s all that most gamers will care about with regards to a console like the Retron HD: How does it look, and can it play all my games? But, in the interest of a compelling blog post, I felt I owed you more.
So let’s play around with the NTSC/PAL settings and see what happens!
I happen to own a copy of the European version of Metroid, so this was a good opportunity to use it. I’d tried it out before on a regular NTSC console, and while it works, it runs a little too fast. Putting the cartridge in the Retron HD in NTSC mode yielded the same result, as expected. So, I tried switching it over to PAL mode, expecting it to run normally. What I got was a game that still worked, but actually ran slightly slower than normal. I think I’ve heard that PAL games actually do run a bit slower than NTSC games, but I don’t know the technical details of it. I did, however, find that running PAL via the composite output to an NTSC television results in a black and white image that’s a little squashed (I expected some sort of issue due to the broadcast differences, but I didn’t know what it would be); the HDMI output looked normal. So that was interesting to discover.
I was running out of stuff to make the Retron HD do, so I thought of one last-ditch, mad scientist experiment.
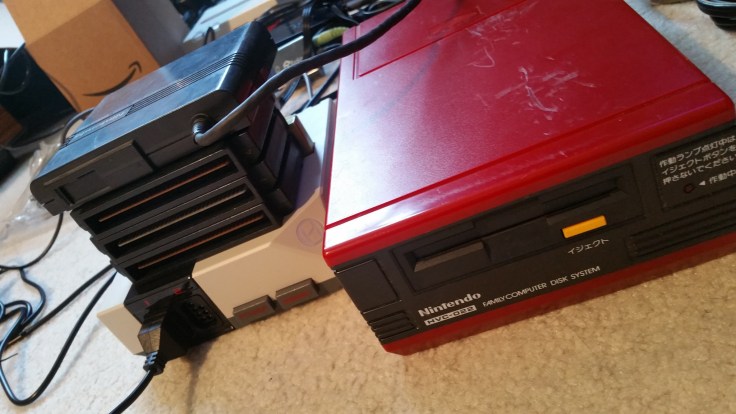
Yup — I tried attaching a Famicom Disk System to the Retron HD through the Honey Bee. I stacked a few Famicom cartridges underneath the FDS ROM pack for support, just to make sure I didn’t damage my adapter.
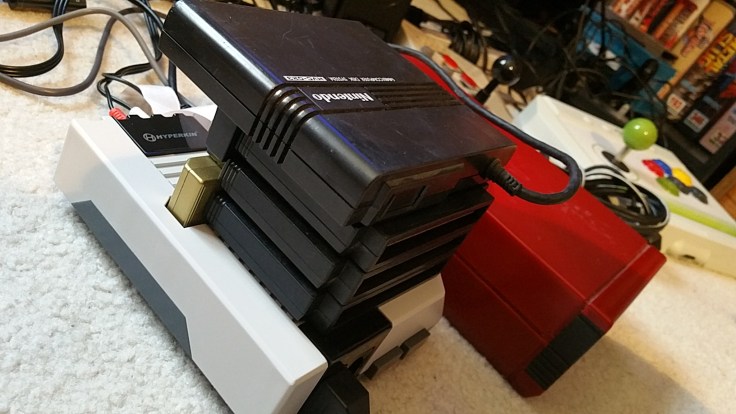
Not expecting it to work, I was shocked when…it worked.
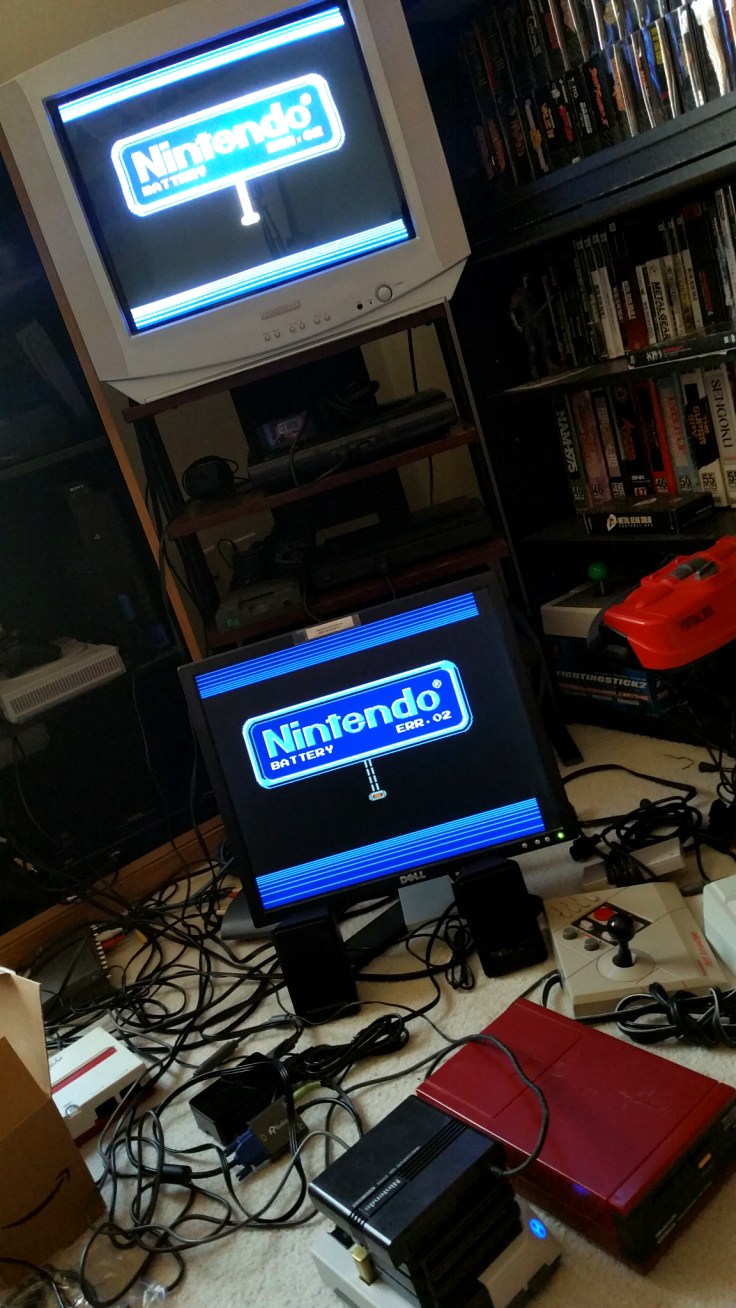
I mean, my FDS itself actually isn’t working at the moment — it’s got a timing error and I can’t get an AC adaptor to work with it and I didn’t have any batteries for it when I tried this — but still, it looks like there’s no reason this couldn’t work with a functioning unit.
Final Thoughts
So there you have it. I like the Retron HD. It’s not perfect. At the price point of $40, it’s an entry-level machine, not a high-end unit like the $190 AVS or the $450 Analogue NT Mini, but it’s meant to be an easy solution for anyone who just wants to play NES games on current HDTVs now that CRTs are in dwindling supply. It’s made for convenience, not for high-performance, and that should be good enough for most people who just wanna get their Super Mario on. But honestly, I’ll probably continue to use it on the CRT until the TV dies and I’m finally left with nought but HDTVs in my possession (I have a couple backup tube TVs in storage, I’ll go down swingin’). I’m a little crabby that it won’t play my Gradius II and it’s having some issues with Recca, but I’ll just have to use my Yobo, or my Famicom, or finally get around to fixing up a couple of my original NESes. In the meantime, I’m just happy I can safely get my games in and out of this thing without breaking anything.

1 Pingback