I did a whole blog post a while back about how much I love joysticks/arcade sticks/fightsticks. (Actually, I don’t play a ton of fighters these days, so I guess for me they’re more “shmupsticks.”) Whatever you want to call that slab of arcade-perfect precision control, I have added them to most of my game consoles, and they’ve enhanced my enjoyment of shmups, fighters, and arcade classics immensely.
So when I realized that I had a handful of shmups on the PlayStation 4, I started to want to add an arcade stick to that platform as well. Then I picked up the Street Fighter II 30th Anniversary Collection, and remembered how much I HATE playing Street Fighter games with a pad, so that made up my mind in a hurry: time to shop for a PS4 stick.
But in this day and age of cool custom arcade sticks, I knew one thing: it couldn’t be just ANY arcade stick.
The first manufacturer I looked at was Hori, as their lineup of Fighting Stick and Real Arcade Pro joysticks are well-known and trusted. But as much as I would love a $150 HRAP, I was looking for something that wouldn’t Shoryuken my wallet quite so hard. Unfortunately, Hori’s only budget-friendly stick for the current console generation is the Fighting Stick Mini 4, which measures a wee 8.3″x5.9″, and I feel that would be too small under my giant man-paws.
Mad Catz, likewise, has a small stick available at a reasonable price, and their higher-end sticks are Street Fighter V-branded, which I didn’t necessarily want.
The rest of the manufacturers were new to me, as I have not shopped for an arcade stick since probably the PS2 era, other than the nice Hori Fighting Stick EX2 for Xbox 360 that I picked up mainly to use for my RetroPie setup (and my 360 shmups as well). I was coming across names such as Qanba, Mayflash, and Razer, none of which I was familiar with. Sanwa, which is a name I knew as they are famous for their joysticks and buttons that are used in actual arcade games (and which many home stick customizers use), also now makes their own brand of home fight sticks. I was left a little overwhelmed with my options.
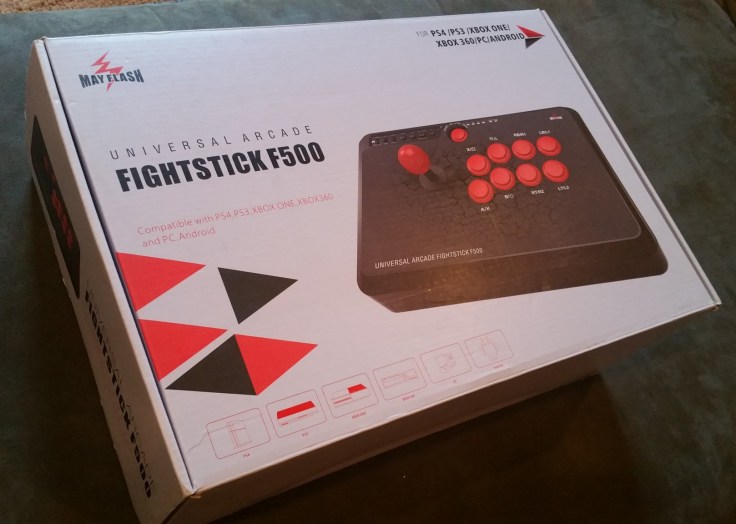
That’s where I was at when I wandered into my favorite local video game shop one afternoon to poke around. I thought maybe they’d have something in stock, but I wasn’t holding my breath. That’s when I spied, on a top shelf, a Mayflash F500. I took the box down and checked it out: compatible with PS4, PS3, Xbox One, Xbox 360, PC, and Android! It was a perfect size, and felt sturdy. And for about 80 bucks, it was within my price range. Sold!
I took it home and played some Street Fighter, some Raiden V, and some Ghost Blade HD with it. It’s a nice stick, and I was happy with my purchase. And yet…I wasn’t crazy about the way it looked. It’s okay, but in the process of doing some of that research, I was coming across a lot of drool-worthy, souped-up, customized joysticks that made the F500 look pretty boring out of the box. Actually, I’ll just tell you the truth right now: I wanted to customize this thing before I even got it out of the store, let’s be honest here. And it turned out that the F500 is easy to modify.
New project, here we come!
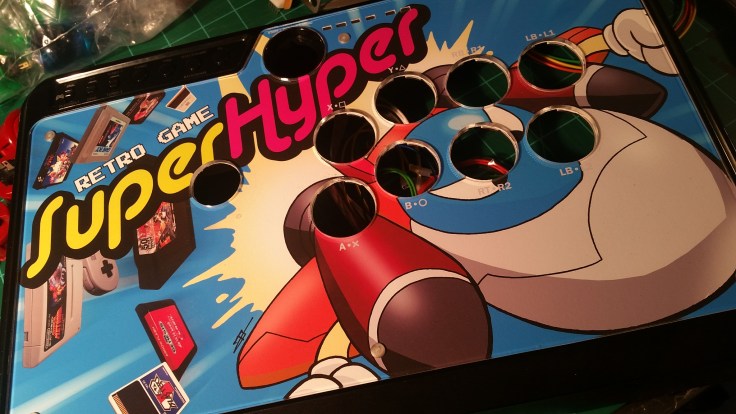
First thing I knew was that I wanted different graphics on the face of the stick. No problem, as an artist and graphic designer, I can handle that. I also wanted to try out those fancy-pants pushbuttons and joysticks from Sanwa or Seimitsu that I’ve heard about for years. And of course, I was excited to pick out new colors for everything.
So I hopped back online and checked out all the different arcade stick specialist retailers, such as Arcadeshock, Focus Attack, All Fightsticks, Paradise Arcade Shop…holy balltops, there are a lot of them out there. In the end, I wound up placing my order with Focus Attack, as they had the parts I was interested in. My grocery list was thus:
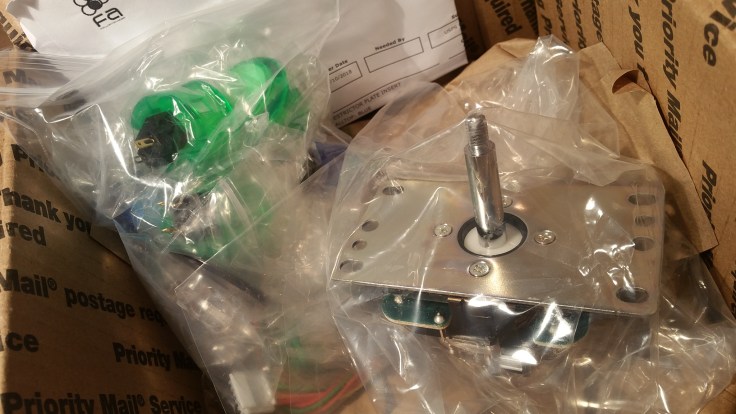
1 Sanwa JLF joystick w/mounting plate
1 Octagonal restrictor gate insert add-on (sticks usually come with a square gate, which is okay, but I wanted to try an octagonal one)
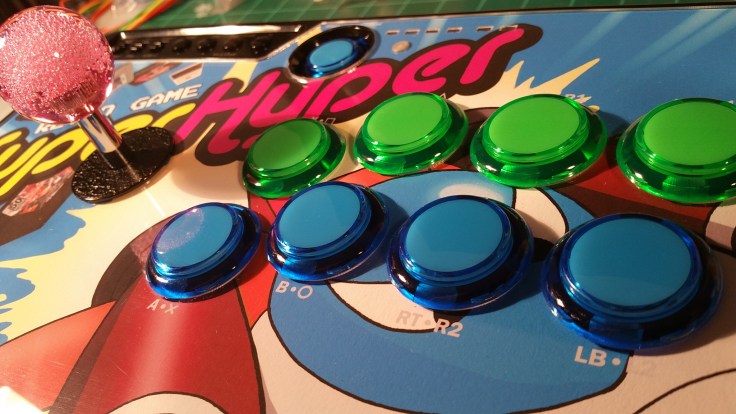
4 Sanwa transluscent green 30mm pushbuttons
4 Sanwa transluscent blue 30mm pushbuttons
1 Seimitsu pink bubble balltop
1 Kori transluscent blue balltop
I wasn’t sure if I needed the joystick with or without the mounting plate, but there was only a dollar difference, so I figured it’d be best to get it with the plate and take it off if I didn’t need it, as opposed to buying it without and find out I had to order one anyway. I also ordered a couple different color balltops for the stick; I couldn’t decide which one I wanted, so I got both in case I wanted to swap.
I waited patiently (okay, not that patiently, I chose 2-day shipping for my order) for my parts to arrive. When they showed up, I was devastated to find that they had sent me four 24mm blue pushbuttons, when I needed 30mm; of course, my devastation was at my own boneheadery, because it was indeed I myself who had, in my overzealous haste, mistakenly ordered the 24mm size. D’oh.
So, back to Focus Attack to check their return policy (it’s forgiving) and order four of the correct size buttons. However, I realized that I could use one of the 24mm buttons for the Mayflash’s Start button (and I had neglected to order a button for that), so I only had to return three of the blue ones.
Finally, with all the correct parts at hand, I was ready to begin the surgery. Oh, by the way…have I mentioned that I’d never done this before? I mean, I’ve wired up arcade control panels before, but that was always with American parts from Happ; I’ve never even seen the underside of a Japanese control panel in person, let alone start monkeying around with one. Ah well — a couple YouTube videos later, I was ready to take a crack at it.

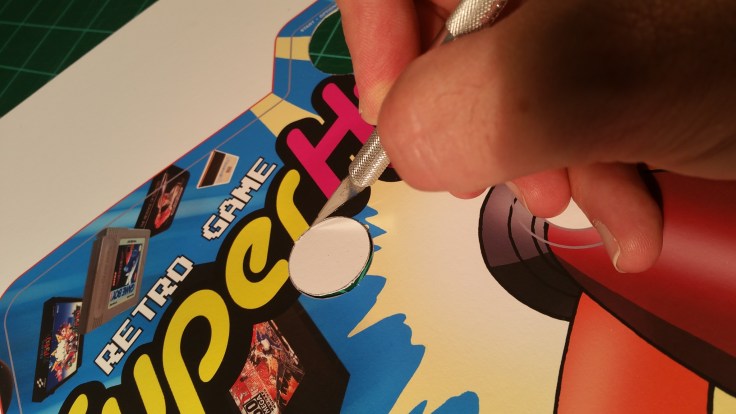
Of course, one of the most fun parts was coming up with the new graphics for the face of the stick.
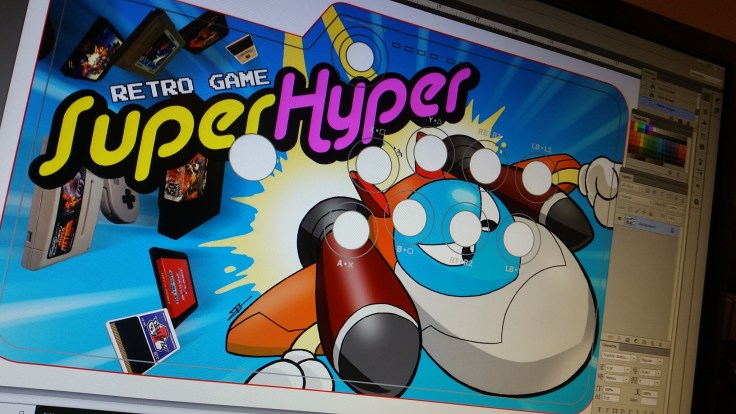
Many of the custom stick merchants listed above do offer artwork services as well, but I have a professional-quality, large-format photo printer, because I do my own art prints; so, I was able to print my own.
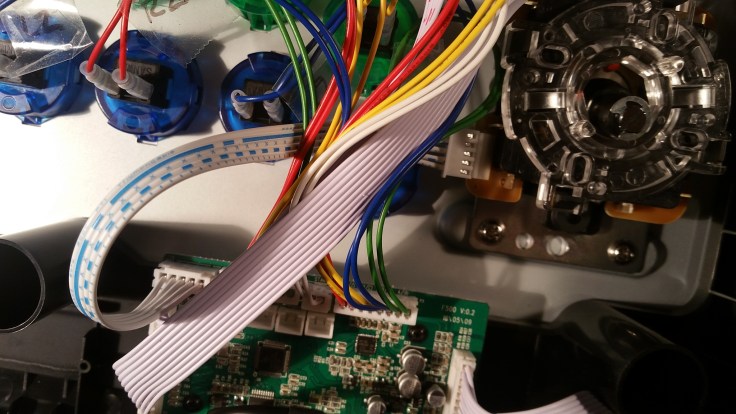
Then it was time to disassemble the stick and finally see what this is all about. The bottom panel has 6 screws to come out, and this is whatcha got inside:
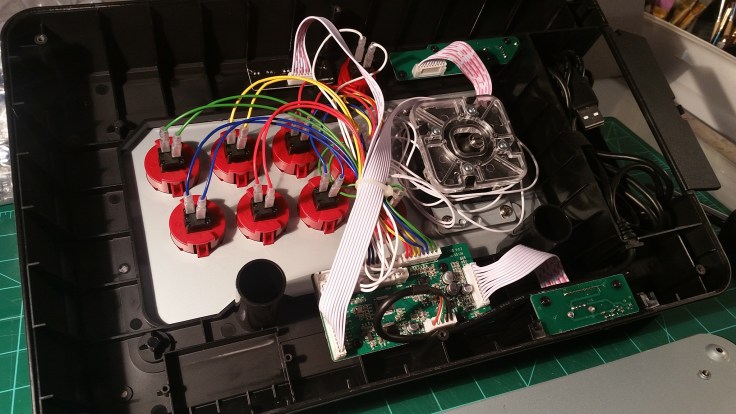
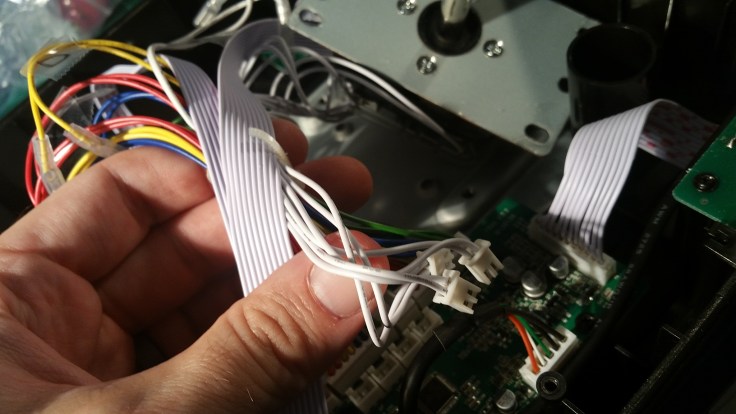
First thing to do is pull the connectors off all nine pushbuttons. Luckily, the wires are all labeled on the PCB:
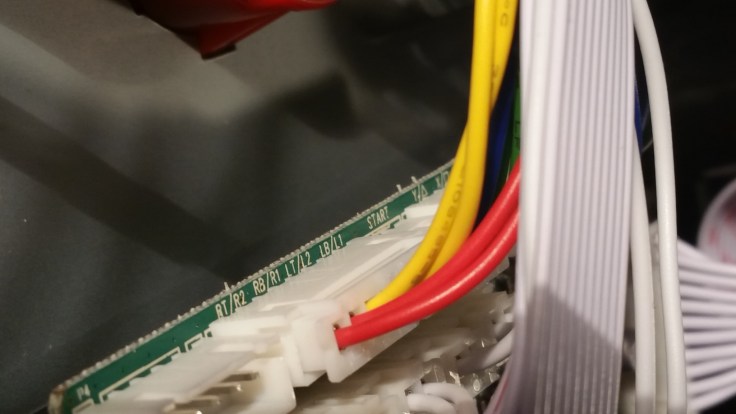
But, not one to take chances, I also stuck pieces of tape to each pair of wires with the button names on them so I wouldn’t get anything mixed up.
Next, I loosened the joystick. You have to stick a flathead screwdriver in the bottom end of the joystick shaft and hold it steady, then you can unscrew the balltop. Then, there are four screws to remove from the metal mounting plate — aha, it was a good thing I ordered the Sanwa stick with the mounting plate, right? I love it when my instincts serve me well.
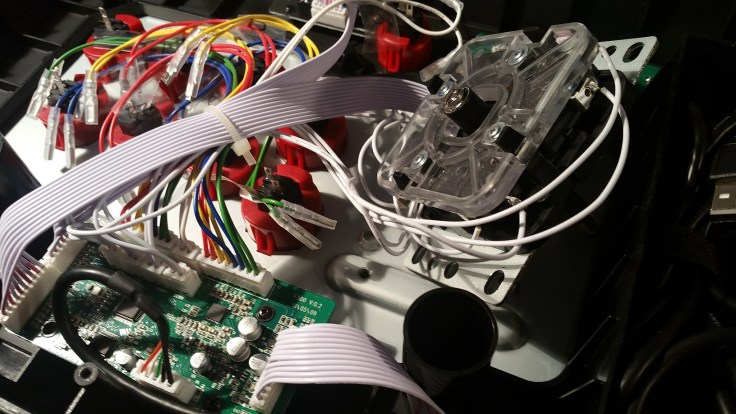
The joystick’s wiring then comes out of the PCB with four little connectors. I also had to snip the plastic zip tie to loosen everything up enough to move it around.
With the stick out, next was to remove the buttons. Unlike the US arcade pushbuttons I’m used to, which are typically threaded and have a large plastic nut to hold them in place underneath the panel, these Japanese-style buttons just have clasps that you pinch together and easily push out.
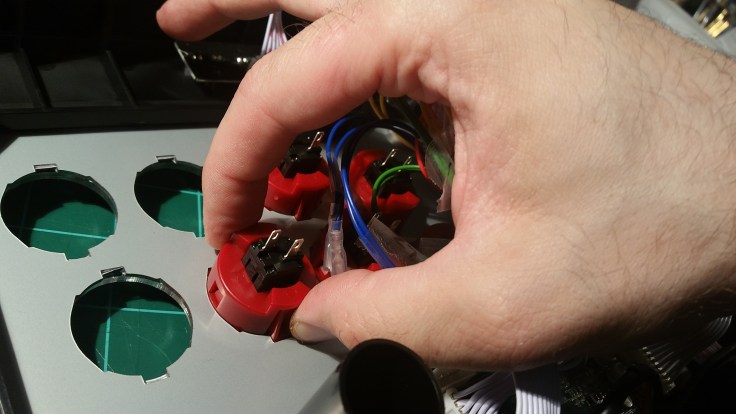
I’d always heard the tales of Japanese arcade staff being able to swap out malfunctioning buttons quicker than a jackrabbit on a date. Now I know why.
With all the buttons and the stick gone, the plastic face and artwork can be removed. The four little metal discs in the corners are actually magnets — strong little suckers, too — that hold the plastic panel in place.
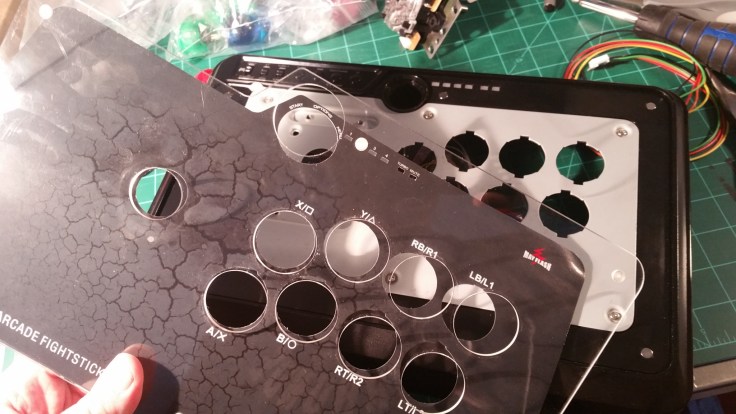
The new artwork is put in place first.
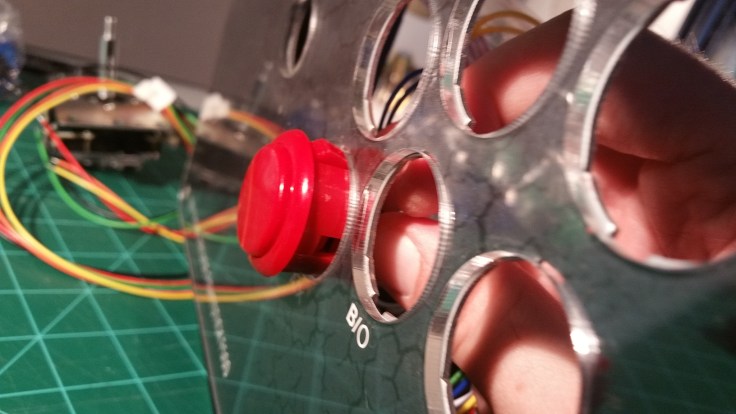
Then the buttons just go back in the way they came out: pinch and push. The connectors just push right back onto the pins on the bottom of the buttons’ microswitches, easy-peasy!
Before installing the joystick, I had to replace the square restrictor gate with the octagonal one. This took a little figuring out, as I couldn’t find out how to do it anywhere online, and it wasn’t immediately apparent when fiddling around. But eventually I got it: you must take the entire clear plastic plate off the bottom of the stick assembly (there are four clips holding it in place, very easy to remove). Then you have to carefully — yet it requires a good amount of finger strength — push up on the square gate, rotate it 90 degrees, and it lifts out. (You can rotate it 45 degrees too, if you’re a weirdo and want your stick movements to feel like a diamond pattern.) Then the octagonal gate must be pushed in and rotated back to position. I couldn’t get any photos of this process because it required both hands, but that’s how to do it.
Anyway, then the new joystick assembly is installed into the housing with the same four screws, and the connector facing the buttons. Piece of cake! Then you just plug the wiring harness into…the…uh…
…waitaminute. The wiring harness that came with the joystick does not have connectors at the end that matches the connectors of the stock stick. In fact, it doesn’t even look like it would attach to the PCB the same way.
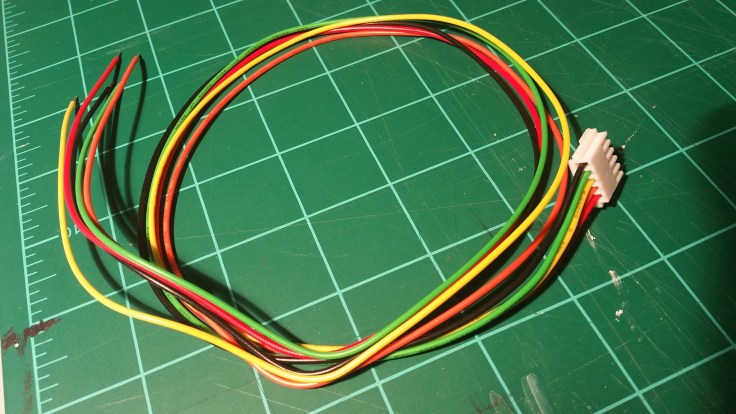
I referred back to some YouTube videos, and saw that the JLF attaches into the wider, 5-pin connector in the upper left corner of the PCB, next to those clearly-labeled button connectors. But I did not have the correct piece to make that attachment.
Back to Focus Attack’s website once again to see if I could find the right part. After some digging, I located it: the Spare 5-Pin Female Harness for Zero Delay USB Encoder PCB. Cost: 75 cents. No shit. My whole project came to a screeching halt over a 75-cent wiring harness.
I emailed Focus Attack’s customer service to make sure this was the part I actually needed, because the last thing I wanted was to make yet another order for the wrong part, even if it did cost less than a buck. After a few days, they got back to me and said that yes, that piece was a direct fit for the JLF and the Mayflash, so I ordered that little sucker while my almost-finished arcade stick sat on my workbench, just waiting for its chance to play Caladrius Blaze again.

After only a few days, that goddamn spare 5-pin female harness for zero delay USB encoder PCB showed up in my mailbox, and off I went, back to the Retro Game SuperHyper Research Laboratory to finish what, by this point, seemed like my life’s work.
Boop-boop, two little pushes and my stick was all wired up!
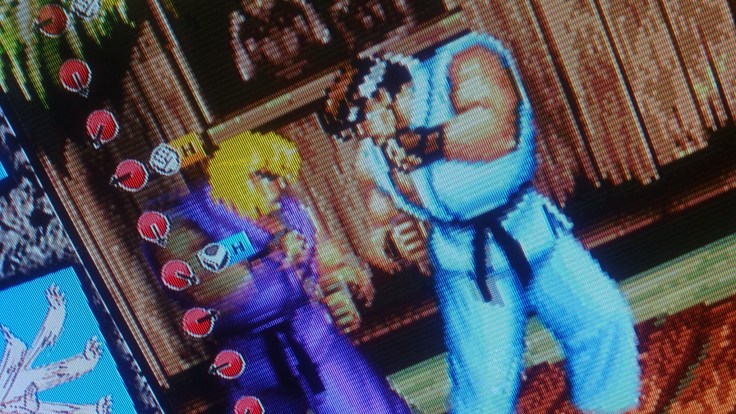
…at least, I hoped it was. Hopefully nothing was put on backward, or upside-down, and I didn’t break anything in the process. Welp, only one way to find out, so before putting the metal bottom panel back on (see, there I go thinking ahead again), I took it down to the PS4 to test my work. I threw in the SFII Anniversary Collection, went into Training Mode, and turned on the input display.
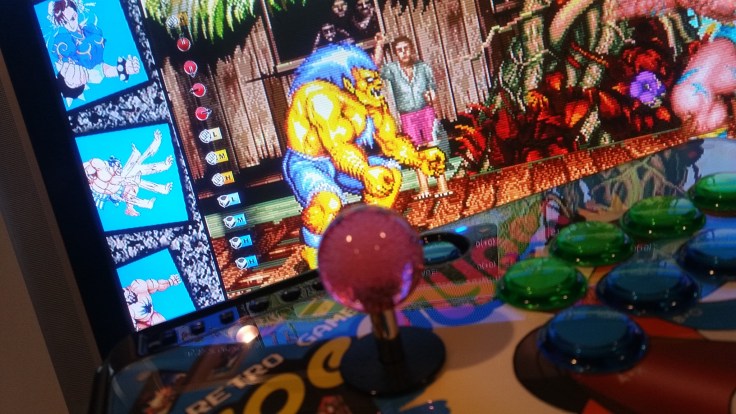
Everything worked! The first time, even! I was also very happy with the way the octagonal restrictor gate felt, and how easy it was to do quarter-circle moves.
Back in the lab, I put the finishing touches on my work.


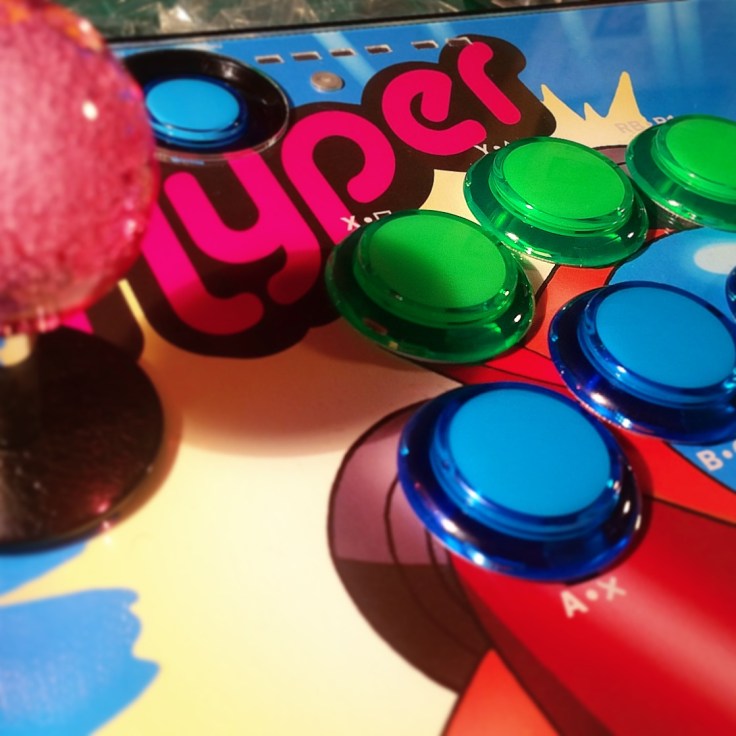
Et voila! The stick, she is done!
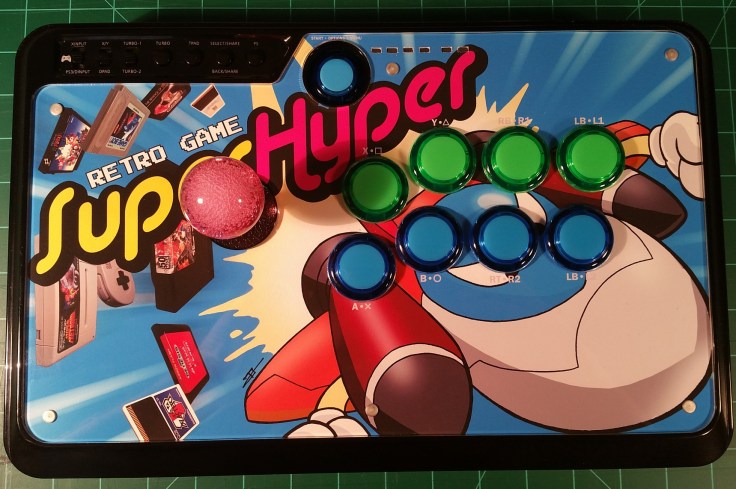
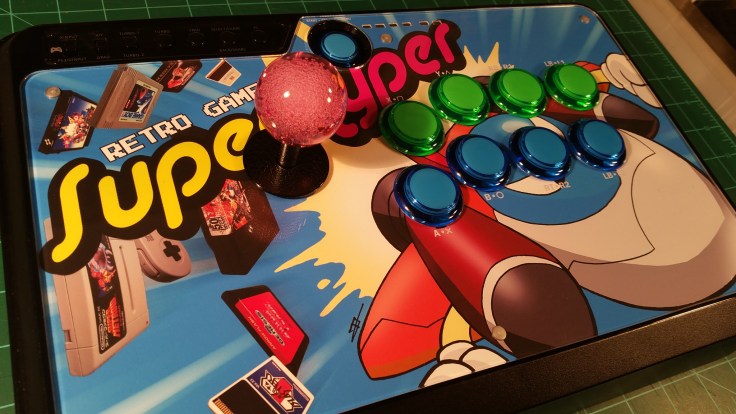
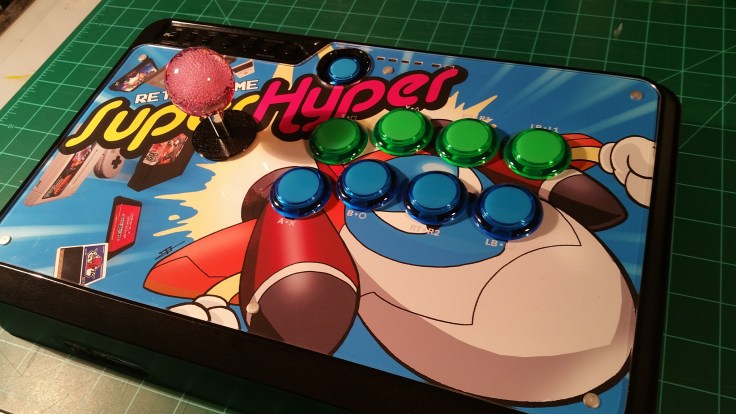
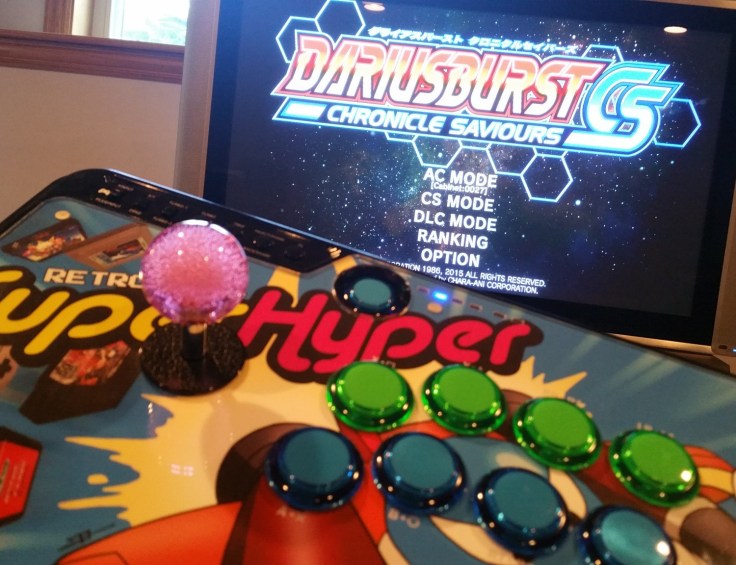
And now my Mayflash F500 is all customized and rad and it feels really good to use, and I learned a bunch of new stuff.
.
.
.
Wait…what’s that?
If you’re in the market for this type of project, or just a new fight stick, all of the merchants I listed above look great. But I have to give big thanks to Focus Attack, LLC for being my supplier and for their amazing and thorough customer service!!

October 16, 2018 at 11:28 am
The stick looks great! I’ve heard good things about the Mayflash sticks.
LikeLike